My project has stalled for many reasons. The biggest reason is procrastination. Another reason is that I had an outdated MacBook Pro from early 2015. I followed the React Native development environment setup guide. I could not install any of the dependencies necessary for local development. At the prerequisite step of updating Homebrew, I was stuck. So I decided to splurge on a new MacBook Air. The timing was perfect because Apple just released a new version of the laptop with a M3 chip. And I upgraded the memory to 16GB. I was prompted for an update to MacOS Sonoma 14.4 out of the box. Perfect! Now that I have the latest and greatest, this means smooth sailing from here right? Or so I thought…
I opened up the React Native development environment setup guide again and started to follow each of the steps.
First open up the Terminal app located under Applications > Utilities > Terminal. I added Terminal to my dock because I know I’ll be using it quite often.
Install Homebrew with the following command in Terminal and follow the on-screen instructions:
/bin/bash -c "$(curl -fsSL https://raw.githubusercontent.com/Homebrew/install/HEAD/install.sh)"After Homebrew is installed, add Node and Watchman by running the following commands with Homebrew:
brew install node
brew install watchman
Now I can download Xcode from the App Store on MacOS. I downloaded 15.3, the latest version (as of March 30, 2024). Next I want to add testing simulators through Xcode depending on what platform I want to develop for. Opening up Xcode, from the top menu I go to Xcode > Settings > Platforms, it looks like this:
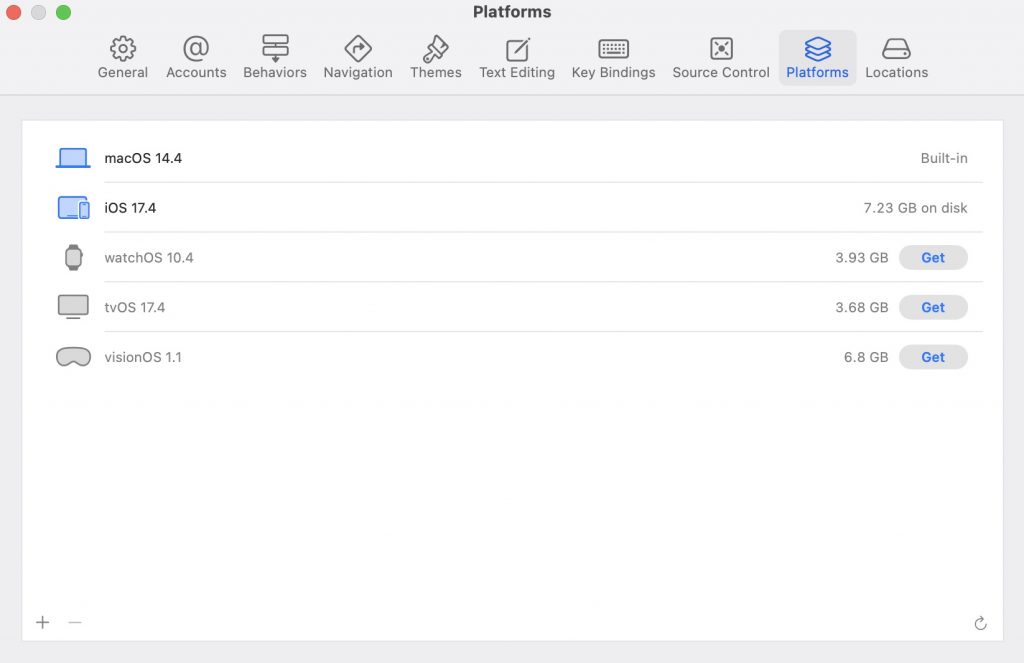
Nothing fancy, I just want to develop for iOS. I selected to get the iOS platform simulator only.
When I got to installing Cocoapods, that is where I ran into issues. I can install Cocoapods through Homebrew or Gem. I tried both ways and neither method was successful. The underlying problem was that MacOS Sonoma comes packaged with an older version of Ruby (2.6.10). Trying to install Cocoapods will yield the following error:
ERROR: Error installing cocoapods: There are no versions of cocoapods-downloader (>= 2.0) compatible with your Ruby & RubyGems.
Maybe try installing an older version of the gem...
Instead of trying to install an older version of Cocoapods like the error message says, it made more sense to just add the latest version of Ruby (3.3.0 as of March 30, 2024).
IMPORTANT: Do not upgrade the MacOS system version of Ruby. The system version is also not recommended for general use because it will lead to permissions errors and other issues. The recommended approach is to install another build of Ruby.
I followed the instructions to install Ruby for MacOS Sonoma skipping the step to install Homebrew again. In my home directory, I ran these commands to add ASDF. ASDF helps manage the two different versions of Ruby that will exist in my system:
git clone https://github.com/excid3/asdf.git ~/.asdf
echo '. "$HOME/.asdf/asdf.sh"' >> ~/.zshrc
echo '. "$HOME/.asdf/completions/asdf.bash"' >> ~/.zshrc
echo 'legacy_version_file = yes' >> ~/.asdfrc
exec $SHELL
After that I run this command to add the Ruby repository:
asdf plugin add rubyI don’t need to install Node again because I already installed it with Homebrew. I run the commands to install Ruby and make this new version the globally used version:
asdf install ruby 3.3.0
asdf global ruby 3.3.0
gem update --system
From now on when I use Ruby on the command line, it will direct to this version of Ruby. Now I can properly install Cocoapods. I chose to install it using Gem.
gem install cocoapodsAt this point I’m almost to the home stretch! I am ready to run the command that creates the KeepIt100 project. In my home directory I run:
npx react-native@latest init KeepIt100I wait for the project to finish generating. Everything seems to be working as planned. I am very excited at this point because I can see the light at the end of the tunnel. It outputted some further instructions for iOS which also appear on the React Native development environment setup guide. My home directory now has a new KeepIt100 directory where all the generated project files live. I switch over to the KeepIt100/ios directory and run these commands:
bundle install
bundle exec pod install
Much to my chagrin, I run into another error:
xcode-select: error: tool 'xcodebuild' requires Xcode, but active developer directory '/Library/Developer/CommandLineTools' is a command line tools instanceBut the project successfully generated. So maybe I don’t even need this and I can just run it. At this point I just want it to work already. I try running the build in Terminal. As you might have guessed, it was riddled with errors and build failure. I also tried manually opening the project on Xcode (by going to KeepIt100/ios and opening the KeepIt100.xcodeproj file). The project opens fine in Xcode, but attempts to build it was also riddled with errors. This means I can’t ignore the previous error. Searching on Google did not yield any solutions that fixed my problem. On the surface everything looked correct. I triple checked my Command Line Tools selection in Xcode (by going to Xcode > Settings > Locations). The selected option is the only one available. Everything looked correct:
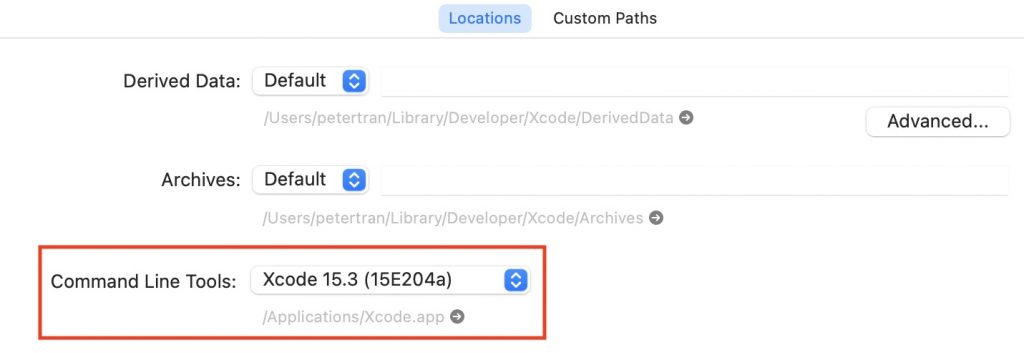
I had no idea what was going on. After playing around with a few things, eventually I figured out the issue. I analyzed the xcode-select command in Terminal and read up on all of its options. As it turns out, the Command Line Tools path wasn’t pointing to the right place and simply needed to be reset by running the following command:
xcode-select --resetThat did the job! Now I can go back and run the bundle commands in the KeepIt100/ios directory without any errors. And finally (most importantly) I can run:
npm startThe test project successfully compiles and initiates the iOS simulator:
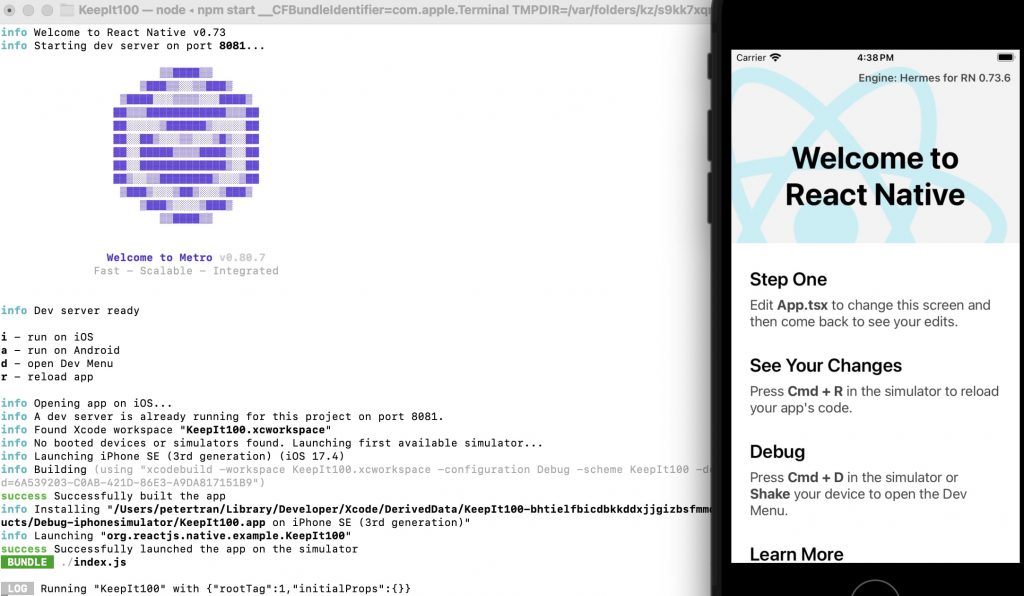
My local machine is now ready for development!